Category Archives: my garden

garden gates

Last fall I was at the local metal supply shop where they were having a special on sheets of stamped stainless steel. About that time I was thinking of rebuilding the gates to the back yard. The stainless sheets were 4×4 feet, narrower than the opening that need to be gated. But after a little work with pencil and paper I came up with these two designs.


What you see are the back sides, the sides that have a little more detailing, and the sides that I like the most. On the second gate I spaced and cut the center support too short so that I had to fill in with another piece of wood. I wound up liking the repaired version than the original drawing. With construction and with photography, I like to plan a bit ahead of time. But accidents will happen, and they often make the outcome a lot more interesting.

Basic materials: ribbed stainless steel, ipe hardwood trim, painted pressure-treated wood structure.

how to scare adults and small children

A box showed up last week. Inside was a plant I’d bid on on eBay, Darlingtonia californica, the cobra lily, a plant for the new bog garden. It was a nice little division, packed in sphagnum and still wet from the bog garden it had just left. I showed it to John.

“It’s enought to give me nightmares,” he said, shuddering a little.

Darlingtonia californica

I have this scare of snakes, a fear instilled in me by a nanny who took me to the Rangoon zoo and pointed out the the banded kraits. “See that one? It can kill you with one little bite. And that one,” she said, pointing out the Burmese python. Well, she didn’t need to say anything. Multi-feet long, and as fat as I was, there was no question I wouldn’t want to feel its loving embrace.

Some people want gardens that are pretty and make them feel good. But somehow I end up getting this plant that has more than a passing resemblance to my childhood fears. Maybe it’s about time I faced them head-on. And as scary as this plant is, I think it’s also fairly amazing-looking. And for the first time, I have this compulsion to give this plant a nickname, something like…Audrey

bad day for ferns

After three weeks of days in the 60s the last two have pushed into the 80s. It’s the kind of intensely sunny spring weather that makes people productive or delirious. Next door they’re playing basketball and downing beers, and here at home John and I have been getting a final coat of paint on some steel stairs to the roof deck that had started to fade and show some rust spots. For us, the beers and margaritas will flow later this afternoon, when we go over to Mason’s and Carlos’s for dinner.

What is a great day for humans hasn’t been so kind on the Australian tree fern, Cyathea cooperi that we put in the ground last fall. General planting guidelines for them say to give them semi-shade, except near the coast, where they can tolerate full sun. Three weeks ago we had a weekend like this one, suddenly sunny and hot after a long period of cool weather. The plant wasn’t used to the heat, and the last set of fronds suddenly browned.

Fortunately the fern was producing a more fronds at the time, and they since unfurled into a gorgeous new set. Hopefully that hot weather prepared the plant for more sun and heat, and that the new set of fronds doesn’t dry up like the last ones did. We should find out in a few days.

Still, in the end, I won’t worry too much. This is about as hot as it ever gets at the coastal edge of town. The plant is getting established, and it’s fully capable to produce more fronds just in time for the cool, overcast months ahead, months with conditions that the locals have dubbed “May gray” and “June gloom.” Now that the sun’s out, though, it’s time to work on my tan…

april plant combinations

The garden is always changing. As plants mature and others come into bloom, I’m always seeing combinations of plants and interesting relationships between them. Here are a couple plant combinations in the yard that I’m particularly happy with.

This is Homeria collina, a South African bulb, with an unidentified rosette-forming succulent–quite likely a graptopetalum, possibly G. ‘Point Dexter’s’ or G. paraguayense–blooming in the foreground and cascading over a retaining wall. It’s right on the sidewalk in front of the house, and it’s extra-nice that you see the combination at eye-level.


I like how the purple-gray tones in the succulent complement the color of the block wall, and how its orangey tones work well with the homeria.

In the back yard there’s a different group of things converging, a bromeliad going out of bloom, some red Russian kale that’s just about ready to pick, plain white landscaping pansies that are nearing the end of their lifespans, and a Penstemon with its first flowers of the season. (The kale was much more purple just two weeks ago, before the weather started to warm up.)

In a couple of weeks these combinations will be gone, and there’ll be new ones that I’ve never seen before. All these joys of gardening!

winner of an ugly contest

Last summer John and I were at the farmer’s market in Ocean Beach, a funky, alternative neighborhood of San Diego. We were looking over some of the offerings at a stall when someone behind me starts laughing and shouts out over my shoulder, “Look at those ugly-ass tomatoes!”

Obviously someone used to the perfectly shaped (and perfectly tasteless) grocery store tomatoes, he was pointing out a pile of Cherokee Purple tomatoes to his girlfriend. “They’re, like mutant. Who’d buy that?” To be sure, the tomatoes were flat, irregularly shaped and sized, partly green and partly reddish-purple. Nothing to win a spot on a pinup calendar of tomato varieties. But these tomatoes have their rabid followers, and I count myself one of them. They’re like the best tomato you’ve tasted, and sliced up they’re actually pretty attractive.

The above is a picture from the Seed Savers Exchange catalog [ source ]. These are prettier examples than you usually find of this variety.

One person even has a domain name, cherokeepurple.com attached to his blog entries about trying to grow this variety (without much success) in Arkansas. I might not be that rabid, but last year I decided to save some seeds from the best examples of Cherokee Purple from the farmer’s markets so that I could grow my own. This is an heirloom, open pollinated variety, so they should come true from seed.

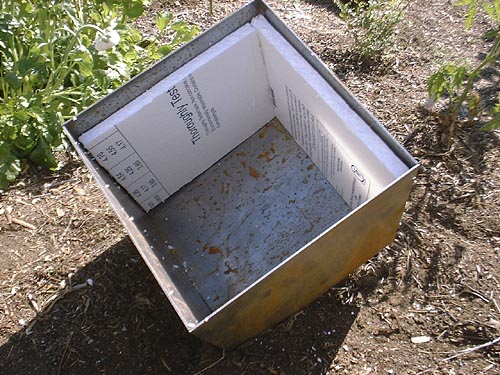
I consulted Saving Seeds, an older book by Marc Rogers that’s still available via Amazon (and probably a few other sellers). If you own the book, give it up–You’re a plant geek. There, the basic instructions were to first clean the seeds as best as you could. Next you drop them into a jar full of water for a few days until the gummy pulp surrounding the seeds ferments and liberates the seeds. When that happens, the previously pulpy seeds–which floated–would sink to the bottom of the jar. Finally you drain and dry them and store them away. I followed the instructions, but I was worried that there was still some pulp attached to some of the seeds when I was done with the process so that not all of them sank.

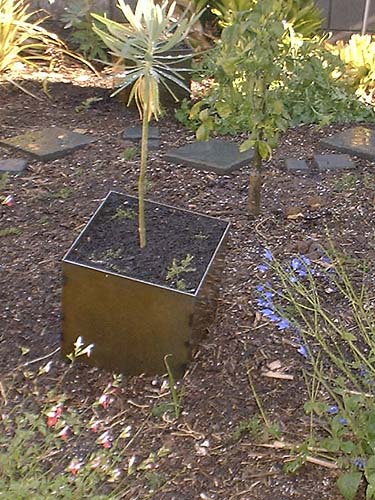
The acid test came three weeks ago when I put some of the seeds into pots. Maybe not all the seeds were processed perfectly, but I’m now the proud parent of six pots of Cherokee Purple seedlings!

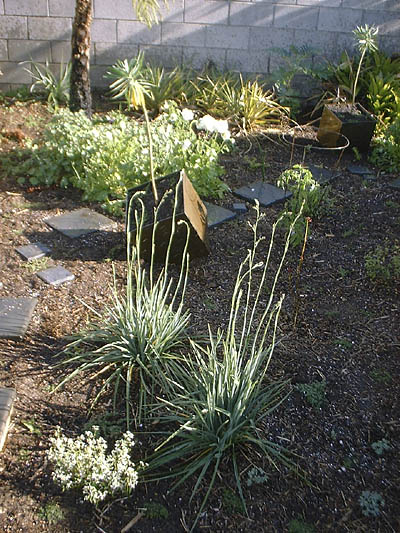
I have a few spots around the yard selected for them, places where I’ve never put tomatoes, so I’m hoping they’ll take to their new locations and thrive. I’ll probably give them a couple more weeks in their pots, and then it’s time to set them loose. I’ll post the baby pictures as they grow up…pictures so ugly only a parent and lover of Cherokee Purple could love.

protea pink ice

proteaplant.jpgShown here with its last flowers of a long season that started last fall is Protea x Pink Ice, a hybrid between the species P. compacta and P. susannae. Although one of the growing guides says this stops at 5-7 feet tall, it’s now pushing 10 or more, egged on by a cool and moist winter.

The shrub is well-behaved, and responds well to gentle pruning. But you grow it because of its flowers, and they’re pretty exotic:
proteapinkice.jpg

When I get all piney over not having a cold enough climate to properly grow lady’s slipper orchids or produce even a small apricot crop, seriously cool plants like this begin to make up for what I can’t do.

steel cube planters, part 2

Below are instructions on constructing the steel planters I discussed in my last post.

For each planter, you’ll need:

  • 5 sheets of 12-guage steel, cut perfectly square (I used pieces 1-foot square)
  • disposable welding supplies: either welding wire or steel electrodes

Tools:

  • welder
  • 90-degree corner clamps (aluminum Pony clamps work well)
  • the usual welding protection: welding shield, gloves, sturdy shoes, long sleeves and long pants

Assembly:

  1. Clamp the sides together in a way that the final bottom piece will be able to slide into the assembly at a slight slant.
  2. Tack the pieces together using 3 1-inch beads per corner, making sure to leave room for the bottom piece to fit into the planter without running into the welds. Also make sure that two adjacent sides will have their lowest welds a little higher up to be able to accommodate the slanted bottom piece. (You could also use a slightly under-sized bottom panel so you could us it without slanting it, maybe 12 x 11 1/2 or so, depending on how much drainage you want.)
  3. Slide the bottom piece in at an angle, tilting it a little bit extra to not make the fit too tight, leaving slight gaps for water to drain.
  4. Tack weld the bottom in several locations.

That’s basically it. It’s a good idea to clean off the oils from the mill using a degreaser or strong detergent. That step will get the rust started. But if you’re anxious to get patina quicker, you can use a weak solution of acid. I used a stop-bath strength dilution of acetic acid from one of my old photo darkroom bottles, but I’ve heard that vinegar (basically acetic acid as well) works just fine as well. Be sure to wear gloves and eye protection, and don’t inhale the nasty fumes! The finish won’t be totally rusty, but it’ll give you a good head start to a nice patina.

A lot of people swear by weak pool acid (aka muriatic or hydrochloric acid), but you’re getting into territory where the materials start to get unnecessarily powerful. You might be in a rush to get more patina faster and think that using strong acid is the way to go. But when the acid gets too strong, it actually removes rust, so staying with something weak and safe is the best way to go. If I haven’t deterred you, though, check out the discussion at Metalgeek for a moderately safe method for the truly impatient.

One little final finesse concerns the use of insulation. Plants in pots often suffer from roots that have to abide wild temperature swings far beyond what they’d experience in the ground. I’ve always felt that metal containers, with their spectacular abilities to transmit heat effectively, potentially could make for some of the most hostile root environments. So I decided to insulate the sides of the pot that would be facing the most intense sun. This heavily canted cube in particular cried out to me for some protection from the extreme heat of the midday rays…and I just happened to have some leftover 1/2 sheet insulation sitting around. So, before I planted the cubes, at least one of the sides got a piece of insulation to moderate the worst of the sun’s heating effects. Here’s a peek inside:cubesinsulation.jpg

All this is a grand experiment. The insulation may or may not make a difference. I’m sure the cubes will eventually rust out, though hopefully not for ten or more years. In hindsight, priming and painting the interiors might have given the planters a bit more life, but the euphorbias planted in them will eventually outgrow their homes anyway.  What in a garden is forever?

steel cube planters, part 1

This is the result of one of my weekend projects:

cubessingleplanted.jpgIt’s one of four steel cubes that I assembled to put in the new raised bed. The sides of the bed are made of sheet steel that’s already weathered to a rich, warm, rusty patina, so I wanted some pots to put in it that were of the same material.

John vetoed my first avant-garde conceptual ideas for arrangements, arrangements that worked with competing systems of geometrical hierarchies, one of them based in part on some of the ideas behind Bernard Tschumi’s postmodernist and highly conceptual Parc de la Villette in Paris. But below is one that I finally came up with that makes us both happy. It has some of the geometrical tensions that I wanted to work with. At the same time, the arrangement of the elements is a little chaotic and whimsical–to the point that none of them sit flat on the ground–a quality that appealed to John.

Each pot is planted with the identical plant material. Euphorbia lambii is placed in the center, pointing as perfectly upright and away from the earth’s core as I could manage without getting out the level, an effect that I’m hoping will point out how crookedly each planter is placed. Creeping thyme will eventually protect the top of the slanted top plane of potting mix.

This is an overview of two of the other containers in the garden space, here in the middle- and background, with part of the new stepping stone pathway:

cubesoverview.jpgIf you have basic of welding chops and a supplier that will pre-cut pieces fairly accurately, you can make them yourself in an afternoon. You could also make similar containers by screwing the steel plate to little pieces of angle iron. Part 2 of this post provides some basic instructions for the welded version shown here.

return of the native

I’ve been watching the seedlings, and now they’re just beginning to bloom: Ranunculus californicus, a.k.a. “California buttercup.”

ranunculus.jpg

I bought a plant at a native plant sale maybe ten years ago. The species gows 18-24 inches tall, is drought-tolerant, and stays pretty showy for a couple months in the early spring with bright heads of these simple yellow flowers carried above the delicate and shiny foliage. It self-sowed readily without becoming weedy, so that one plant became a nice handful. That nice handful, however, got run over by a little backhoe a couple years ago when we did a little addition to the back of the house. Where there used to be garden there was just trampled dirt. Now the first ranunculus are back, maybe not exactly where I’d want them, but close enough.

With too many of these native California plants, they show up at native plant nurseries, but when you go out to the wilds you hardly ever run across them. But one of the last times I was hiking around the local San Clemente Canyon preserve, maybe 3 miles away, I looked down and there it was: Ranunculus californica, as happy on the hillside as it was back home in the garden.

into the wild

A couple posts ago I mentioned dichelostemma blooming in the garden and I was thinking that they were probably also blooming wild in the natural spaces around me. I took a lunchtime walk through one of the semi-wild areas on the north part of the campus of the University of California, San Diego. The area has been set aside as a natural preserve, although “natural” in this case is actually a canyon of native plants mixed in with some earlier 20th century plantings of eucalyptus. Fake as it may be as a genuine Southern California chaparral ecosystem, the edges where the grove meets the scrub starts to take on more native flavors.

There had been heavy rains this past January, followed by occasional wet periods, so the ground was still moist in spots. The weather was now turning warm, sunny and spring-like. Grasses were growing exuberantly. It wasn’t long before I started to notice occasional flowers in the understory. Although the spaces under the eucalyptus prove hostile to most flowering plants other than the occasional also-imported black mustard, the blue dicks were pretty content to be there, a single plant here, big rafts of them there.

bluedickswild2.jpg
A flowering head of Dichelostemma capitatum, mixed in with the grasses and eucalyptus

bluedickswild.jpg
A larger stand of them, with their little flower heads raised up two feet or more in the dappled shade

I was tuned in to what I was seeing, but in the back of my mind I was aware that back in my garden the same species of plants was also blooming. Back home the blue dicks are part of a long continuum of “springtime” flowers that begin with the first narcissus in October and continue into a number of plants that have yet to bloom. But in the wild areas of Southern California this is it. Spring is short and–in a wet year like this one–intense, orgiastic. As the weather warms the rains will stop. The grasses will die out and the flowers will fade out. Soon the long brown season will begin. But in the fictionalized natural world of my garden, spring will be here for several more months. I’ll enjoy it for sure. But somehow it seems a little wrong.