Tag Archives: hardscape

background check

buckwheat-without-background

My last post has me thinking more about the backgrounds that plants grow against.

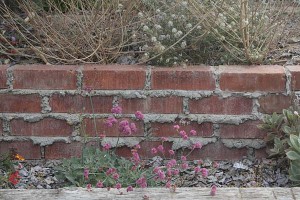
I was getting excited that the San Miguel Island buckwheats(Eriogonum grande var. rubescens) that I’d grown from seed were coming in to bloom. But standing back from them, I realized that the place where I’d transplanted them–a raised bed with a red brick retaining wall behind it–might not have been the best place for the plants.

The dusky pink flowers blend so well with the reddish colors of the brick that they practically vanish. And the busy gridded background of the brick and weeping mortar draws so much attention that anything in front of the wall just gets ignored.

buckwheat-with-background

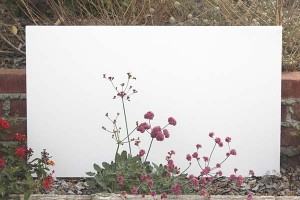
What would it look like against a more neutral backbround? I wondered. And so I went to grab a piece of white matboard and positioned it behind the plants.

Wow. Big difference. It’s suddenly easier to make out the shapes of the umbels of flowers, and you can begin to appreciate the subtle color of the flowers.

buckwheat-with-background-closeup

Up close, the white background almost made the plant look like a botanical illustration.

buckwheat-with-bug

The low contrast against the background didn’t prevent this bug from finding the buckwheat. Clearly, a bug’s eyes and brain don’t work the same way our human ones do.

Once these plants grow in more and achieve some more height they should stand a better chance of holding their own against the background of busy brickwork. But the plants will never “pop” against the wall in the same way they’d show against a simpler, more neutral background. So, in the “note to self” category, I’ll be paying more attention to contrasts between the plant and the hardscape around it.

reclaimed from concrete

Two posts ago I mentioned the Crack Garden, a winner in this year’s ASLA awards program that made me think in a new way about dealing with too much concrete. Ryan over at Dry Stone Garden has some different thoughts on the project that are worth a read.

porch-1

And as long as we’re talking about reclaiming space from what used to be paved over, let me show you a few shots of my front porch. (Notice how fanatically I staged the space for these photos, including coiling the leaky old hose off in the corner. That’s a level of creativity you never see in the garden design mags.)

The area was all concrete until two, three years ago. This was from the years when a lot of concrete was poured with strips of wood to break the expanse of concrete into neat rectangles. Nice idea, but over the years the wood rots. The concrete shifts.

porch-from-above

So I dug out all the decaying wood with a chisel. Next John and I spent a couple hours with a sledgehammer removing some of the big squares of concrete, and then I poured black-pigmented cement to grout between some of the slabs.

I probably didn’t do enough to prepare the ground. Why spend time doing that when there’s bare dirt where you can put plants? So in went some blue fescue in a grid pattern. (Fortunately a few of the plants died, breaking up what would be a cliche of little blue fescues all lined up neatly in their rows.) And then a plant of red shisu for contrast, two standing stones, three stepping stones, a potted euphorbia, gravel mulch and the coiled garden hose to complete the picture. (The shisu is an herb that dies back every year, but it reseeds like crazy, letting you decide where you want some dark red foliage this year.)

porch-with-hose

Okay, ASLA. I’m ready for my Honor Award.

avoid, or embrace the inevitable?

Today I want to talk about a couple things that seem inevitable: Garden plants will die; and, concrete hardscape will develop cracks.

Strategy 1: You could try avoidance, developing ways to get around those facts.

You may have heard of the recent garden at the Chelsea Garden Show designed by James May of Britain’s Top Gear automotive program. The plants (and insects) were all made of plastic modeling paste. It was totally artificial. A garden that will never experience death—but neither will it ever experience life. (And what would you call a “garden” like this? Landscape or hardscape?)


If you want to avoid cracks in concrete walkways or patio covers, you could avoid concrete altogether. For instance, you could employ alternate materials like decomposed granite or one of the attractive alternative paving systems highlighted over at Steve Snedeker’s Landscaping and Gardening Blog.

Or you could embrace what’s going to happen anyway.

chicago-lurie-snow

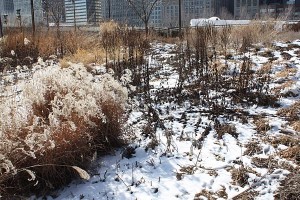
Some plants look attractive after they’ve passed on for good or just for the season. To the left are some plants at Piet Oudolf’s Chicago Lurie Garden as they appeared this past February. Picking structurally interesting plants like those can keep things looking good, even in the presence of things in the garden that may be dying. This is a big and rich topic that I’ve touched on occasionally in my posts, and I’m sure to return to in the in the future in more detail.

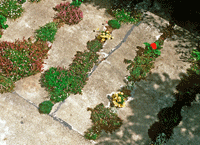
And how do you embrace cracked concrete? I was over at Pruned, where this brilliant winner from the 2009 American Society of Landscape Architects Awards was highlighted. The project by CMG Landscape Architecture of San Francisco played up the natural tendency of concrete to crack, as well as the tendency of plants to colonize those cracks.

Crack garden(Photo: Tom Fox)

The recipe:

Take one piece of cracked pavement.

Jackhammering

Apply a jackhammer to widen the cracks. (Photo: Kevin Conger)

Planted crack garden

Amend the soil, and then place plants of your choosing in the enlarged cracks. (Photo: Tom Fox)

Total project cost, with homeowner labor: $500. The final results are surprising, and so is the final cost, particularly when you consider it’s a project involving professional landscape architects.

screening with wood, screening with plants

front-screent-from-walkway

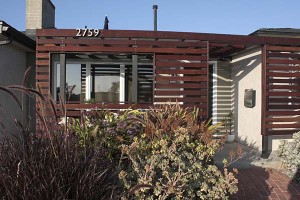
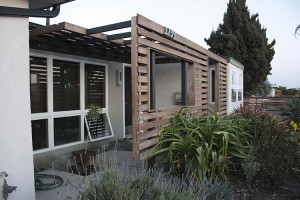
I showed the almost-complete version of this front porch screen earlier, but that was before we applied the final stain to the wood. Here it is in the really final version.

deck-railing-corner-showing-stained-and-faded-posts

deck-railing-stained-and-faded

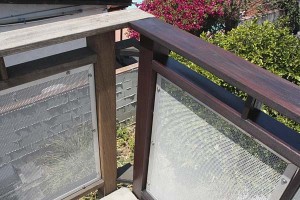
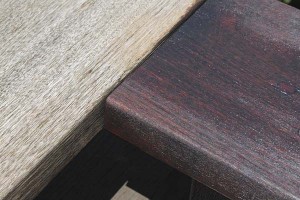
As long as we were staining wood, we got up to the deck and attacked the railings with the same stain. It had been more than a year since we’d done it last and things had faded. You can see the before and after pretty clearly in these pictures. (This project used an oil-based stain for hardwoods. They make a water-based stain that claims to last seven years, but it ended up flaking off this oily ipe hardwood on the small project we tested it on. Total disaster. Save it for softwoods.)

How do all of you react to exterior wood that’s aged to a silver color? This project is still on the new side for us and we wanted to keep it looking as it did when we first finished it. Staining all the tops and bottoms and sides of the wood is a lot of work, though. As we get less able or motivated to keep up with details around the house, I’m sure we’ll let things assume more of a Gray Gardens look.

front-screen-with-new-ceanothus

But back to the front screen… After the project was complete there was a gap between where the screen ends and the driveway. While I’m not one to put up castle walls and a moat between us and the busy street, a little more privacy seemed like a good idea.

Before, we had a couple low lavenders in front of the screen: Nice enough and they survived with virtually no summer watering. But they weren’t much of a privacy screen. Yank. Out they went.

ceanothus-tuxedo1

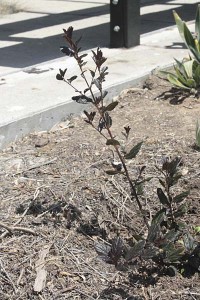
In their place is this new Ceanothus ‘Tuxedo.’ I’d done a post on some garden ceanothus not long ago, and I couldn’t stop thinking about the near-black foliage of this variety. With the lavenders gone, there was a perfect place for it.

Okay, stare at the picture of the little gallon plant and ask the obvious question: “Wasn’t the idea to install a plant that would screen the view from the street?”

Ceanothus tend to be rapid growers. This selection is new to the trade this spring, so I’m not sure exactly how rapid it’ll be. Still, I expect that it’ll approach its target size of six feet by six feet before too long. I’ll post more pictures as it fills in.

our front porch project

We began this project to redo our front porch surround last year. It’s not totally finished, but it’s at a point I thought I’d share it with you.

The house originally came with an enclosure around the little front porch/patio area that made it feel like you were behind bars, doing time for a crime you didn’t commit. We took a saw to the original porch cover and provided some breathing space in it, but it always felt like an uncomfortable retrofit. As the termites dealt a terminal blow to the first enclosure, I developed this completely reworked design, sort of a deconstructed patio cover, with openings through the front screening panel, as well as an open, incomplete canopy overhead.

porch-cover-front

This shows the shelter from the front of the house. The big window cut into the screen lets you see out into the neighborhood, while not making you feel caged.

porch-cover-front-angled

Another front view, approaching from the side of the house…

porch-cover-from-above

And a last shot from the roof, showing the partial covering overhead. Many of days are overcast, and we really would prefer sun over shade most days. This reduced cover shelters the big main window and front door, but lets more light in than an edge-to-edge cover.

The new wood needs to season just a little bit before the final finishing, and the old wood will need to be scrubbed to clean it a bit. But once the finish is on, it should really look great. I’m pleased!

Main materials: pressure-treated lumber for the support structure (painted black, to fade into the background); ipe hardwood lumber for the slats; exposed stainless steel screws for fastening the slats. The ipe hardwood is potentially the least green component of this project. Although my local lumber supplier is assuring its users that their ipe “is harvested from professionally managed sustainable forests,” some of my research is now saying that the claim just may be a crock of greenwashing. Ugh.

Choosing sustainable materials for an outdoor project is challenging. There are interesting discussions you can wade into, including an introductory Sustainable Decking Solutions post that’s worth a look. If you must use ipe, a supplier like AltruWoods can supply FSC certified lumber for a project, and might have been the better choice for getting materials for this project.

Whatever you do, reducing the amount of materials you use is a beginning. The post above recommends that “[o]ne green building idea with a lot of merit is treating wood as a luxury. Trees help the planet the most when they’re alive and globally, the acreage per forest is dwindling rapidly. Using wood as a common structural and outdoor finish material is not a long-term sustainable practice.” Good advice.

How do you all approach trying to be greener in your outdoor projects? I suppose one excellent alternative to a patio cover would have been to plant a tree. It’s a concept our grandparents would have signed on to…

dramatic wall colors and plants

I still haven’t gotten around to doing something about the color of the my little detached studio behind the house. Colors of residential neighborhoods and garden walls usually tend towards pretty neutral shades. Here are a couple combinations of walls with plants that I thought were pretty dramatic while still being flattering to the landscaping. They could be interesting choices for garden walls or even–if you’re truly brave–walls of your house.

tustin-marketplace-wall-and-plantings

This first one is the freeway side of the Tustin Marketplace in Orange County, as see from Interstate 5 on my way up to LA last week. The fairly dark burnt red-to-salmon wall coloration mixes dramatically with the green bougainvillea foliage and reddish magenta flowers in the foreground. And the silver trunks and bright green foliage of the trees in the background stand out dramatically against the wall.

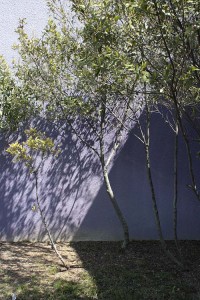
purple-wallThe second is another retail situation, the plantings by the parking lot at the Mission Valley Mall here in town. The violet wall, as the preceding reddish one, once again plays against the silver trunks of the trees and the bright green leaves.

The first combination to me feels warming and energetic without being too hyper, with the red being a color that isn’t so far removed from the Mediterranean themed housing that continues to be popular in Southern California. The second is definitely cooler, more restrained–and maybe a little more urban and adventurous.

We’ll see how brave I am when I finally have time to address residing the studio and rebuilding the attached patio cover. But I’m definitely feeling like doing something other than white or beige this time…

just about to be published

catalog-cover1

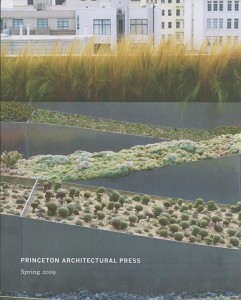
Linda brought by my desk the 2009 Spring catalog of the Princeton Architectural Press. She really like the photo on the cover, a planting by Andrea Cochran, a San Francisco-based landscape architect and the subject of a new book, Andrea Chochran: Landscapes, which is just about to be published. (The project shown is the Ivy Street Roof Terrace Hayes Valley Roof Garden in San Francisco.)

You may recall that Linda is a quilter, and the cover design really looks quilt-like in the way it’s put together: blocks of different plantings (not just blocks of single kinds of plants), all assembled together so that one grouping of plants contrasts dramatically against another, like one patterned fabric in a quilt that’s been set against another. In fact the author of of the book describes Cochan’s work as “studies in repetition and order, orchestrations of movement in the landscape, and elements placed in geometric conversation”–which almost sounds like the principles operating behind many quilts.


Check out Andrea Cochran’s website for other examples of her strong, linear landscape designs.

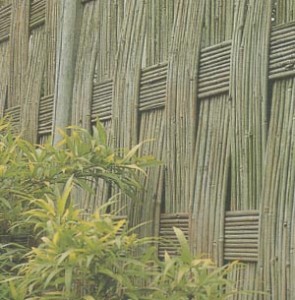
Thumbing through the catalog I ran across another title that made me stop for a closer look, Bamboo Fences, by Isao Yoshikawa and Osamu Suzuki. The catalog says that the book “provides a detailed look at the complex art of bamboo fence design in Japan, presenting these unique structures in over 250 photographs and line drawings. From the widely used ‘four-eyed fence’ (yotsume-gaki) and the fine ‘raincoat fence’ (mino-gaki) to the expensive ‘spicebush fence’ (kuromoji-gaki), these exquisite designs impress with their simple beauty, providing plenty of inspiration for your own bamboo fence.

bamboofence1

“Author Isao Yoshikawa gives a brief overview of the history of bamboo fence building in Japan and classifies the different designs by type. A glossary provides explanation of Japanese fence names and structural terms.”

Of course, fences like this probably wouldn’t work so well if your house is in the Tudor or Spanish taste. Unless of course you want your home to develop a “home store Gothic” look that one writer called the look that suburban houses accrue over time as their owners buy whatever strikes their fancy at the local Home Depot, historical accuracy and style be damned.

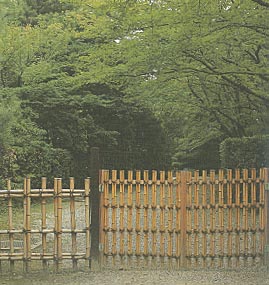
bamboofence2

But imagine these around a clean-lined modern house. In fact, Richard Neutra was known to like his glass-walled homes to look out on a Japanese-styled landscape. And some of the more geometric versions might even look amazing behind a landscape designed the the subject of the first book….

bamboofence3

Above: Images from the book, photographed by Osamu Suzuki.

recycling concrete

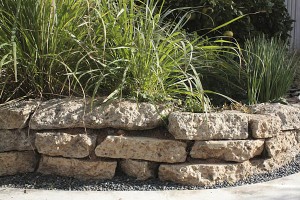
One of the easiest ways to reuse broken concrete is to stack up the pieces to make a low garden wall.

recycledconcretewalloverview

My house came with an expanse of dangerously uneven, cracked concrete that needed to be removed. One option would have been to haul it off to the landfill. But turning the scraps into this little wall for a raised vegetable garden ended up being a greener solution.

The hardest part was breaking up the concrete into manageable pieces. (We used a sledgehammer). And lifting the twenty to sixty pound chunks into place made for some hard work. But it was basically an “easy” job in that it wasn’t particularly technical and didn’t demand too many brain cells.

If your soil is especially unstable, the concrete could be set on top of a foundation. But for almost all soils, and for a low wall like this one–about twenty inches tall–don’t bother. Try to stagger the joints between pieces from row to row to make the wall more stable. Work to nest the pieces together as tightly as possible to minimize soil loss out the sides if you’ll be using the wall for a raised bed.

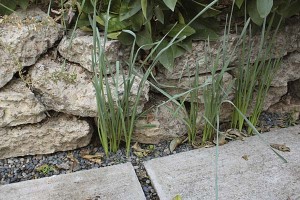
If you would like a softer look, you could also plant little succulents or compact rock-garden plants into the crevices. Creeping sedums, alyssum, low varieties of thyme or trailing strawberries would be good, easy choices for a wall that has a sunny exposure. You could also plant low-growing bulbs or annuals in front of the wall.

recycledconcretewalldetail

The result is definitely on the rustic end of the spectrum, more “cottage” than glam or glitzy. But you’ll feel better about not filling up the landfill. And in the end the project could be easier than loading the chunks into a truck to haul them away.

turfstone

Turfstone with grass

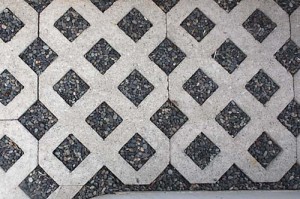
Some of my garden shots have had some perforated concrete pavers shown in them. In case you’re wondering what it is, it’s called Turfstone, and is one of several products out there that are designed to allow you to have a lawn that you can drive onto.

The basic idea is that you interplant the little holes with grass, and the concrete blocks keep vehicles from cutting ruts into the lawn. You of course could also fill the holes with other kinds of plants.

If you don’t want to have to water your driveway, or if you want a sturdy but porous material to use to cover a French drain–which is what we wanted–you could fill the holes with material like crushed rock or pebbles, as we’ve done here. Using a contrasting material brings out the interesting grid pattern.

Turfstone with pebbles

The material is somewhat specialized, so you local home store probably won’t have it in stock, though they may be able to order it for you. Failing that, the blocks seem to have a pretty wide distribution so that a landscape materials firm could probably find it for you.