a new weed

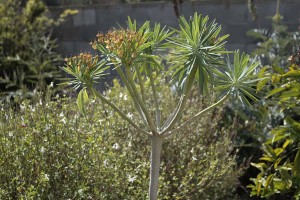
This past winter I was noticing a weed popping up all around the yard that I hadn’t noticed before. I was mentioning it to John, and added, “I’m not sure what it is, though think it could be some sort of euphorbia.”

Then in the gently tactful way spouses have of correcting you and pointing out your blind spots he quietly cleared his throat and pointed to one of the four young potted plants we have around the garden of Euphorbia lambii, one of my dry garden-adapted plants from the Canary Islands. “Maybe it’s that?”

Uh, like duh. What else would it be?

Last year was the first that these plants bloomed, and this spring they bloomed with a vengeance. During sunny weather over the last few weeks I’ve heard little popping noises from the direction of the plants, and have come to the conclusion that the sounds were that of seed pods exploding and jettisoning the dust-like seed everywhere.

I may come to regret the day I introduced these to the garden, which according to my records is March 9, 2008.

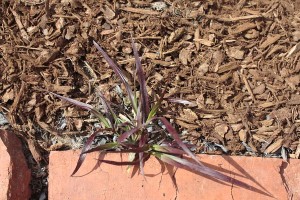
Speaking of weedy plants, here’s another surprise seedling from the garden, a little baby red fountain grass, one of three seedlings I noticed this year. In recent years the related green fountain grass, Pennisetum setaceum has become a noxious (though stunningly beautiful) weed and has landed high on virtually every thou-shalt-not-plant list issued for California. But many people gave a by to this related red plant. It was often pushed as being sterile and incapable of reproducing by seed, a piece of misinformation even I relayed in this blog. (I’ve corrected that earlier oops in case anyone reads that earlier post.) As you can see here it can reproduce by seed, though this form doesn’t spawn the same way regular fountain grass does. Nor is it immediately the same monster pest that feather grass (Nassella tenuissima) can be.
Poking around the web I found an updated plant description at San Marcos Growers that includes some interesting background on this plant:

Recent work in preparation for the grass sections of the Flora of North America, which will include naturalized and cultivated grasses, indicates that the name chosen for this plant will be Pennisetum advena or perhaps P. x advena. Dr. Joseph K. Wipff, previously with Texas A&M and now a turfgrass breeder, wrote the section on Pennisetum and has indicated that Red Fountain Grass is most likely a cross between P. setaceum and P. macrostachys (AKA ‘Burgundy Giant’). As a hybrid the name would most appropriately be Pennisetum x advena ‘Rubrum’. The latin word advena means “newly arrived” or “stranger.”

So is it safe to plant this form of fountain grass? Here’s my thinking: Hybrids between species are often sterile. (Think of mules, the offspring of a horse and a donkey.) But every now and then something happens that allows the hybrid to reproduce. Sometimes the seedlings will be just as nearly sterile as the immediate parent, but other times a mutation could render the seedling entirely fertile. In that latter scenario the nearly-sterile fountain grass could turn into something with the ugly invasive potential of its Pennisetum setaceum ancestor.

In other words, today I would be cautious and not plant it. Unfortunately, almost twenty years ago, we designed the front yard around a big mound of the stuff. The plants look stunning and move graciously in response to the breezes. Their size is perfect for the spot, and their red color is unmatched among other grasses. Every now and then I look at other options, like those recommended in the Don’t Plant a Pest brochure put out by the California Invasive Plant Council. But these lists often fall short in the alternatives they offer and end up reading like, “Cheesecake is bad for you. Would you like to eat this delicious raw rutabaga instead?” So…I’m still looking for the perfect replacement plant–hopefully some sort of native, but in the meantime I’m pulling the occasional seedlings.

bog plants, three ways

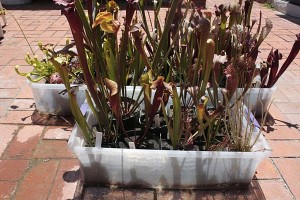
Arleen of Camissiona’s Corner asked about how I made the little bogs where I’ve got various swamp and other moisture-loving plants. Here’s a quick rundown of the three different methods I use to keep these plants happy.

The most straightforward is the classic water-tray method. You basically take your potted plants and stand them in a tray of water. It keeps the pot moist-to-wet as long as you have water in the tray. I like to let the tray dry out for a day or two so mosquitoes don’t start breeding in the water.

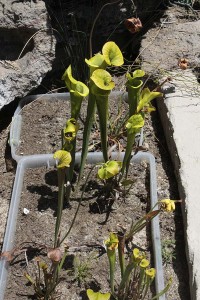
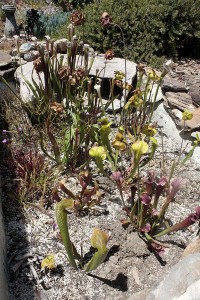
My method number two is to grow plants without pots in undrained tubs. Here I’ve buried the tubs in dirt at the level of the tub to distract from the ugly container. Since I’m primarily growing sarracenia, American pitcher plants which detest rich soil, the mix I’ve used here is a low-nutrition combination of one part clean sand to one part peatmoss.

Here you see the plants from the side. The ugly tub practically disappears.

This technique has the disadvantage in that the bottom of the tub can develop anaerobic conditions as the water sits. I’ve heard of some growers installing watering tubes that deliver new water to the bottom of the planter. This lets fresh, oxygenated water occupy the place of the old, stale stuff. Other growers don’t bother with it. This is my first year with this system, so I can’t comment on how well it does.

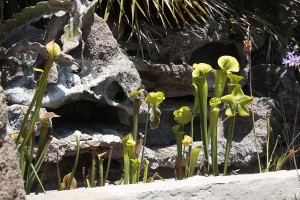
The third method I use is similar to the last in that it uses a basically impervious container this time with some drainage. In this case, I converted a shallow concrete fishpond that was the constant target of neighborhood critters. I drilled several drainage holes in the bottom and attached little plastic “snorkels,” short lengths of tubing that fit into the drainage openings and extend up to near the top of the soil line. In theory this keeps the bog from turning into a submerged swamp in the wettest weather, though so far we’ve never received that much rain at once in the three seasons I’ve had this bog. The fit around the little snorkels isn’t perfect, so over time all water will leak out the bottom anyway, keeping this setup from going anaerobic like the method above.

I’d guess that you could accomplish the same result by drilling a few tiny holes in the bottom of the tubs like I’ve used in the second setup. Or you could use a commericially available plastic pond insert. I didn’t do that in my second method because that was yet another failed pond. In this case plant roots invaded the pond and caused it to leak. I didn’t want to encourage the roots again by supplying them with more water.

I’ve never tried growing vernal pool plants in these bog setups, but I think method one and three might be good ways to make it happen. Unlike these bogs you’d want to let the vernal pools go dry during the summer and fall. Choice of soil mix would be another difference to consider. Vernal pools around here form in the thick clay that caps our mesas around town, so the plants would probably want more nutrition that classic bog plants would prefer. Watering with something other than Southern-California water out of the tap would probably be a good idea too unless you’d want the pools to turn into alkali swamps. If you have experience with constructing a synthetic vernal pool, I’d love to hear from you to see if my guesses are close to the mark!

getting real

Echium wildpretii growing wild in Tenerife

Grow this plant and your garden will look exactly like this! (Yah, right… )

[ Right: Image of Echium wildpretii by Mataparda. This file is licensed under the Creative Commons Attribution-Share Alike 2.0 Generic license. ]

I’ve got to be realistic, I keep telling myself. The plant may be cool, but the whole effect probably won’t be much like how the plants grow in the wild or how they’re shown on some dramatically illustrated garden website.

It’s like buying clothes out of a catalog that are being modeled someone impeccably styled and impossibly toned. But because of the recession most of us have had to let our personal stylists go, and when you go to try on the clothes the look ends up being a sad disappointment.

For my last post, on my blooming echiums, I was having a hard time coming up with an attractive photo that showed the entire plant. The plants are growing in a tight corner of the garden that has a woodpile, a rusty shed and a big disorderly stack of stuff waiting to be dissembled and taken to the metal recycling facility at the landfill–not stuff I wanted to publish out there for all the world to see.

From one vantage point the studio walls act as a fairly neutral backdrop, but to take this photo my back was against the neighbor’s wall and I couldn’t get the distance I wanted.

The angles that showed off the plants better also showed off all the junk. Gag.

Okay, back to getting real. My garden will never look like the high volcanic slopes of Tenerife. It’ll never look like the eastern slope of the Sierra Nevada, or approximate the wide vistas of our desert two hours to the east of here. Some of my plants may come from those places, but cultivating them won’t hide the fact that I live in a suburb with neighbors all around.

I guess I look at the garden as a scrapbook or photo album. A plant might have associations with somewhere I’ve been or would like to visit. Maybe I grew up with another of the plants. Yet another may be intriguingly cool even though I have no idea where it comes from. In arranging the plants, in making the garden, I can come up with something where my memories can mix with the shapes, colors and textures of the plants and produce something I like and hopefully will look okay to others.

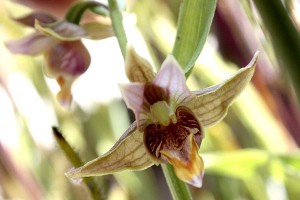
Blooming now in one of my little bog gardens is a stream orchid, Epipactis gigantea, a plant with a huge pile of associations for me. (You can sort of make it out to the left in this photo.) Those memories go something like this: I was taking some of the rough Jeep roads in Saline Valley, a generally unvisited expanse of white sand immediately northwest of Death Valley. I’d camped one night on the west side of the valley at the mouth of a little canyon leading up into the Inyo Mountains. All night long I kept hearing angered challenges from the wild burros that called this area their home. The next morning I headed towards the canyon, keeping a wary eye on the burros that were never far away. Soon I started to hear water. I guess I’d unknowingly plopped myself on top of a trail leading to a water source for the burros–That would explain the angry noises all night.

Soon the canyon folded in around me, and I went from the glaring white hotness of the exposed valley floor to a cool, sheltered outdoor room. Water drizzled down a granite face in front of me. Ferns grew everywhere. And scarlet columbines. And dozens of this plant, the stream orchid, in peak bloom. Imagine that. Orchids in the desert. It was one of those peak outdoor moments that I’ll remember forever.

Well, the little bog garden looks and feels nothing like that May morning in Saline Valley, but seeing this little orchid will remind me of that encounter every time I see it.

echiums!

This must be the year for my prima donna plants to finally decide to bloom. First it was the first bloom for me of the Agave attenuata over the winter. Now it’s this echium’s turn.

This is Echium wildpretii, which has gone from five feet tall two weeks ago to over seven and a half feet.

It’s also known by various common names, including tower of jewels, red bugloss, and–in Spanish–tajinaste. “Tajinaste”: what a gorgeous sounding name, way more musical than bugloss or “tower of jewels,” which sounds a little square to me, like a plant name from a 1927 seed catalog. Tajinaste is endemic to one Atlantic island, Tenirife, off the northern African coast.

This echium species is described as a biennial. Many plants described that way will put up leaves the first year and then bloom the second year from seed, after which the plants produce huge amounts of seed and then die.

Although it’s been known to flower in the second year, this plant’s usual interpretation of the term takes “biennual” literally as “two years,” keeping you waiting that long from sowing to flowering. And there’s one plant in the front yard that looks like it’s going to be taking an additional year. Biennial? I think not.

Still, worth the wait, don’t you think?

The plant grows in spirals. Here you can see the spiraling new flowers.

The central rosette of leaves just a few months before sending up the central bloom stalk.

During the two years you wait for it to bloom, you get to look at an attractive mound of lance-shaped coarse gray leaves, usually eighteen inches to twice that across during its second growing season. When nature withholds flowers you can always look at and photograph leaves. So here’s some of my little crop of Echium wildpretii plant photos.

Echium wildpretii leaves in soft focus

Some of the leaves develop these neat hook ends.

As you can see it’s an attractive plant even when out of bloom. It has low water requirements and looks clean until its final, spectacular exit. After a few months it turns from a big dramatic plant into a big dramatic dead plant with tendencies to topple even before its deep tap root decays.

Its reputation is that it’ll send seeds everywhere at that point, so this might not be the best plant if you live near the edge of a dry natural area. A related echium, pride of Madeira, (E. candicans) has established itself as a pest in some coastal areas of Southern California. I’ll get to see how bad it really is after these plants finally give out later this summer. I’ll worry about that later, but for now I’ll sit back and enjoy the plant.

some local yellow daisies

As the big spring bloom winds down I’ve been struck by how many of the native plants have yellow flowers. It clearly offers the plants an evolutionary advantage since bees love yellow and bees are some of the major pollinators. This is a little roundup of the three yellow daisy-flowered shrubs and sub-shrubs that I grow.

Coast sunflower as you find it...at the coast.

Encelia californica hails from the more coastal edges of Southern and Central California, hence its common name of “coast sunflower.” A dark central button anchors golden yellow rays that shoot out in an informal circle. It’s a popular choice for both gardens flowering roadside wildflower mixes.

The green, green leaves of this encelia.

With so many other natives bearing grayish leaves, the bright green leaves of this plant really stand out. I’ve seen it used locally, where an occasional drink during the summer can help keep it green and flowering through the summer. In my garden the plants have a mostly unirrigated spot behind a fence, so they exercise their natural tendency to defoliate and stop blooming when the weather warms.

Giant coreopsis, Coreopsis gigantea, earns its name more from the tall plant size rather than the size of its flowers. The weird plant will eventually form what looks like a trunk from three to six feet tall that sprout finely-cut leaves. This takes a few years–My two year old seedlings are in the two to two and a half foot tall range. Blooms are perky yellow daisies about three inches across. I planted a little grove of these in a back corner of the garden, but the grove has dwindled to just a few plants thanks to a gopher that found the little tree trunks too delicious to pass up. Grrrr. Times like this I hate hate the full circle of nature.

This last one’s San Diego County sunflower. The current botanical name is Bahiopsis laciniata though I and everyone else I know around here learned its name as Viguiera lacinata. Its flowers come in at about an inch and a half across, so it’s smaller than the previous two. But a blooming bush of it makes a low, neat mound in the garden or in the local wilds. Of these three, the flowers have the most “refined” look to them–if you consider French marigolds and yellow cosmos to be refined plants. Because of it being a local plant it’s a fairly common denizen of local native plant gardens. Also, a lot of coastal-zone roadside restoration projects around here seem to have this plant in the mix.

Although I’ve call all of these “daisies,” each has its own special character and use in the garden. The encelia is a great pick for its long bloom when watered. The coreopsis is a perky mass of flowers when it’s in bloom, but few California natives stand up to it in weirdness during its leafless state in the summer and fall. The San Diego County sunflower is a nice tidy mound with so many flowers you might confuse it for an an annual. But it’s best to plant some decoy plants around it for the dry parts of year when it dies back.

Give them a try. The bees will thank you.

yet another (fun) total waste of time

Services that will print a custom fabric for you have been around for a little while. Now there’s Shortomatic, a firm that will take a design or photo that you upload and turn it into a pair of boardshorts–just in time for summer. Even if you don’t spring the $99 for the shorts, you can noodle around on their site and see what your photos might look like turned into clothing. I played a bit with some mostly garden photos:

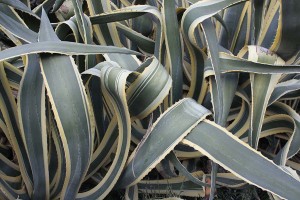
The original photo, some variegated Agave americana at the Huntington Library’s desert garden…

…And the photo imagined as a pair of shorts using the Shortomatic design tool. These have a bit of a lederhosen/bondage vibe. I’m not sure I could pull off this look at the beach.

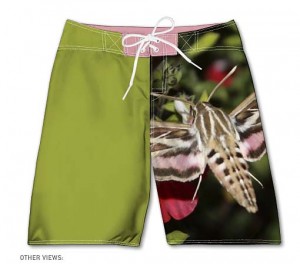
Here’s a photo from last summer of a sphinx moth hovering at night over some sage flowers.

…And the same photo turned into a pair of shorts.

A photo of the West Side of Los Angeles, taken from outside the gardens at the J. Paul Getty Museum on a cool, clear January afternoon.

Board shorts with the skyline used for a border at the base of the leg openings.

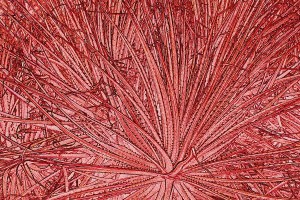
This is another succulent photo, using the “find edges” filter in Photoshop, a huge cliche if there ever was one. And then I took the photo and tilted it towards the red end of the spectrum.

And here’s what it looks like turned into shorts.
Oh good, another black hole where you can throw your spare time…

colleen goes national

Magazine coverColleen Miko, owner of the Pacific Northwest’s Colleen’s, a Landscape Design Company, has one of her garden designs featured in the current issue of Organic Gardening Magazine. In the interest of full disclosure I’m glad to say that Colleen also happens to be my cousin through a couple of fortunate marriage links in the family. She’s received well-deserved regional notice for her landscape work, but this is her first national print exposure. (Edit, May 19: Anyone with access to cable might have seen her on TV earlier, when she was the finalist in HGTV’s Landscaper’s Challenge program.)

Rah Colleen!

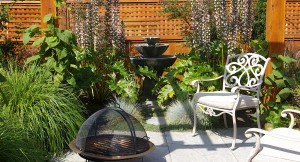
Here’s a peek at one of the spaces in her design. I like how the gently symmetrical plantings helps focus attention on the water feature. In other gardens, fountains and other focal points sometimes feel too small for the spaces they’re allotted. But Colleen’s strategy here gives greater visual weight to the burbling water and the area around it. The whiff of symmetry also brings visual calm that complements the calming sound of water. I’d love to spend some time in this space on a warm afternoon with a glass of Northwest riesling.

Pick up the June/July issue and see more of her work!

Green roof birdhouse

And be sure to pop over to Colleen’s website, where you’ll find other examples of her designs, as well as instructions on how to build this fun birdhouse with a green roof.

my favorite garden gadget

There are people who go gaga over gadgets, and then there are skeptical folks like me. If I buy gadget it really has to promise to do something I need it to do. (Case in point: I still don’t own an i-anything. No iPhone, no iPad, not even–gasp!–an iPod.)

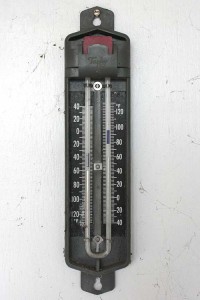
But the gadgets in the garden that I really enjoy having are my two maximum-minimum thermometers. Imagine a device that tells you how hot and cold it got anywhere in your garden over whatever time period you like.

I have one in the greenhouse, where it tells me how hot the temperature got inside while I was at work. This is information you won’t get from a weather report.

You could also use a pair of them to identify microclimates around your yard and to answer specific questions like, Is the lower part of a slope more liable to get frost than the top? Or, how much temperature difference is there between the beds on the north and south sides of the house?

The versions I have are totally analog devices where the mercury in the thermometer pushes up a little piece of metal inside the glass column on both the warm and cold sides. To reset the thing you pull the metal pieces down from the outside using a magnet. Primitive, but effective, as befitting a device that was invented in 1782 by James Six.

Yes, I did say that the thermometers are filled with mercury. Mine are over twenty years old. Regulations in many places today would stipulate that the fluid be something more environmentally responsible, but the devices would function the same way. You can also get these in digital versions, as well as those that have a dial instead of fluid-filled glass chambers. (I generally find dial thermometers to be less accurate in general, however.)

There you have it. My favorite boring little device. You can’t use them to surf the web or make gelato. But then what use does a plant have with Hulu or Facebook?

21,015 tiny little plants

I now have a new appreciation for the work of field botanists.

A couple weekends ago I had a chance to work on a rare plant survey on the slopes of Viejas Mountain in eastern San Diego County. I enjoy seeing plants out in their wild habitat and the description of the task sounded downright idyllic: You go out to trailless edges of the county, enjoy the scenery, and all the while look for rare plants.

San Diego thornmint (Photo: Janet Franklin)

The plant of special interest for this trip was San Diego thornmint, Acanthomintha ilicifolia, a plant found only in a smattering of places in California and bits of northern Baja. And the plant is even more selective than that. It only grows on clay lenses–gently or moderately sloped areas of clay soil that has washed down from nearby areas. The surrounding chaparral plants for the most part don’t care for these soil conditions, so they create openings for this rare annual to colonize.

The project was to get a population count of thornmint from areas where they’d been sighted more than a decade earlier. Comparing today’s numbers against the earlier censuses would give you an idea of how well the plant is doing in the wilds.

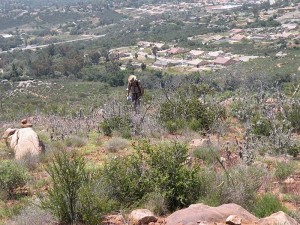
Me, looking for thornmint, enjoying the scenery around my feet. (Photo: Janet Franklin)

Our assignment was population 51, a cluster of adjacent stands on the western edge of Cleveland National Forest, just outside the city of Alpine. (Looking back on the suburban sprawl I thought it looked a little like the photos of Area 51 taken from Freedom Ridge.)

Most of the spread had burned in one of the recent major wildfires to go through the county and was in the state of growing back—pretty successfully, since travel got to be tough some of the day. Whenever the chaparral parted and the soil conditions looked right, you scoured the ground for thornmints, which at this point in their lifecycle were mostly 1-4 inches tall, with most of them not yet in bloom.

No thornimint at this one sub-location, but lots of Palmer's grappling hook, Harpagonella palmeri, one of the species that's commonly associated with thornmint. (Photo: Janet Franklin)

One of the three sub-populations we looked at was completely gone. Nada. Zero plants. Maybe the fire wiped them out. Maybe we weren’t observant enough, though we fine-tooth combed the hillside.

Success--thornmints! (Photo: Janet Franklin)

But the other two populations gave us an exercise in counting plants. Lots and lots of plants. Tiny, tiny little plants.

By the middle of the afternoon we had a count, 21,015 plants. It was six hours of open slopes with no shade spent in deep concentration looking for the little plants, counting all the while.

I’ll confess: We did a little estimating when the populations got really large, and so we didn’t actually physically count all 21,015 plants. But 21,015 seemed like a solid estimate.

While it’s good to know that there are more than a handful of plants left in the wild, it’s also a little unnerving to see that they have such a limited distribution, and more disturbing that one of the three populations from earlier seemed to have vanished.

Locally common, but in the grand scheme of things, awfully rare, especially with human encroachment from Area 51 next door.

Hesperoyucca whippleii, one of the stunning garden subjects shown here in the wilds, with thronmint nearby. (Photo: Janet Franklin)

San Diego thornmint probably won’t turn into one of the great garden plants for California native gardens. But along the way we saw plenty of species closely related to those used in home native landscapes: laurel sumac (Malosma laurina), ceanothus (tomentosus and foliosus), stinging lupine (Lupinus hirsutisimmus), manzanita (one of the Arctostaphylos glandulosa subspecies)…

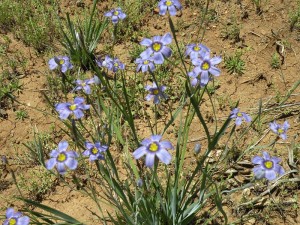
Blue-eyed grass (Sisyrinchium bellum) growing on a clay lens. (Photo: Janet Franklin)

…and one of my favorite flowering natives: blue-eyed grass, growing and blooming among the tiny little thornmints.

Usually my camera is the first thing I pack for one of these outings, but somehow I forgot it at home this time. My thanks to team-leader Janet for the use of her images from the trip!

my new composter

I often get the impression that to get your ticket punched as a real, serious gardener you have to take up composting. Still, I gave up on polishing my halo a dozen years ago. The old-fashioned compost pile I had took way more maintenance than I was interested in…all the hassles, especially keeping the beast stirred and watered.

Since those days tumbling composters have really come into their own as an alternative to the piles that just sit there like Uncle Ervin on his Barca-Lounger in front of the TV. The promise of a compost device that simplifies keeping the mix stirred and aerated sounded almost too god to be true, but I’ve been tempted to give them a twirl.

The opportunity came up as I headed to the back aisles at Costco to pick up some cheese and bread. On my way to the back of the store a big tumbling composter tried to reel me in with its dark tractor beam.

The thing with this store is that you usually have your choice of the one item they offer for sale, which in this case was the 80-gallon Lifetime model 60021 tumbling composter. (Costco offers several other models online.) Even with a price tag less than $100 I resisted at first. But I went home and did a little research online. Judging by the customer reviews people generally seemed to like this model, with the main complaint being being about an internal aerating tube that kept getting bent because it was made out of PVC. It seemed like a valid but relatively minor concern, so I decided to give the composter a try.

The composter in its box, as it looks when you bring it home.

When you buy this model, you’re really buying a composter kit, not an assembled composter. I documented the time I started, before I opened the box, before I assembled the necessary tools (which ended up requiring–among other things–an electric drill and socket wrenches), before I read the instructions that recommended that it would take two adults to assemble it. John is still hobbling around on crutches right now, so I decided to go it alone.

The time when I completed assembling it.
The time right before I began to open the box.

From the documented end time you can see that it took me about an hour and fifty minutes to put it together. That includes time spent taking a few pieces apart after I’d installed them incorrectly, as well as a few minutes when John came out to supervise my work and ogle the new toy. I’m generally pretty handy with mechanical things, if a little impatient to read all the way through instructions. I also did okay hefting the big 65 pound box the kit came in, and had the added benefit of a power screwdriver. Adjust your expectations for assembly time and effort accordingly.

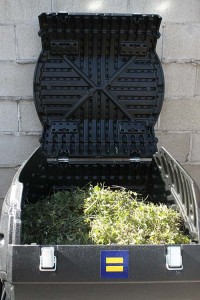
The inaugural kitchen scraps.
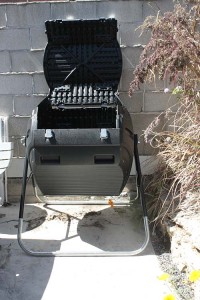
The assembled composter.

Things fit together easily and made for a sturdy, double-walled, insulating composting chamber. Apparently the company read the customer complaints about the PVC aerating tube, because by the time they made my version of the model, the flimsy internal part had been replaced with a rigid piece of perforated metal pipe.

I couldn't resist doing a little trimming of plants around the garden. On even its first day, the composter is well on its way to being filled. The cuttings and kitchen scraps will cook down over time, making room for more waste.

The composter now lives outside the kitchen, alongside the trashcans and recycle barrels. It shouldn’t be hard to keep the compost barrel fed and tumbled. Once the barrel is filled it’ll need a few weeks for the compost to cook to perfection, a time when you shouldn’t be feeding it more clippings and scraps. To do things right, having a second barrel at the ready for those times would be the way to go. Within a few weeks I should have a better idea whether this model of composter lives up to my expectations and warrants my buying a second one.

So, will I become a real, serious, composting gardener? I’d say it’s off to a good start.

an artist loosed in a garden